
Peel and Stick Backsplash Tile Installation Notes
Surface Requirement:
- For a perfect bond, surfaces must be clean, flat, dry, and free of dust, grease, or wax.
Special Prep (Painted or Textured Walls) Follow these three steps to ensure maximum adhesion:
- Sand: Lightly sand the surface.
- Clean: Wipe down with a damp cloth.
- Wait: Let dry completely for 24 hours.
Tool Checklist
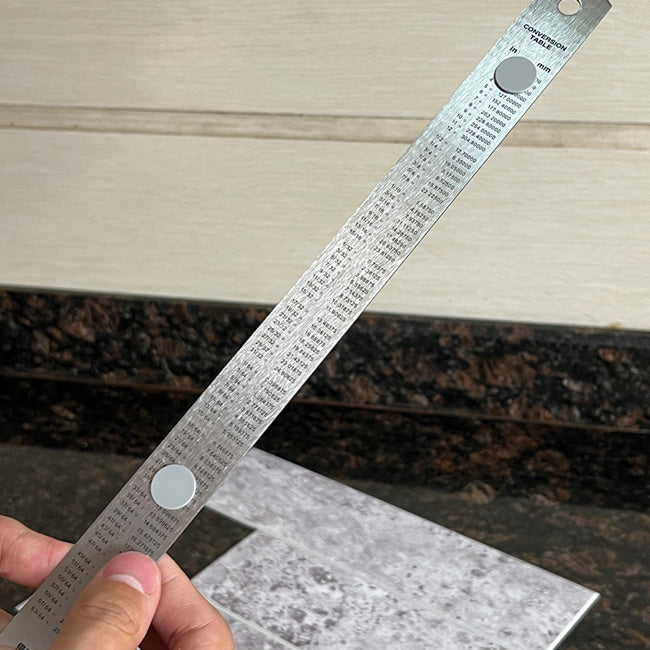
- Prepare tools: Precision Cutting Grips (Free Gift Included) Ruler, pencil, level,
- Prep: Sandpaper. "For best results on painted walls, a quick light sanding helps the adhesive bond for a lifetime."
- Cutting: Utility Knife, Tile Cutter, Tin Snips, or a Saw (Jig Saw/Chop Saw).
Installation Guide
Step 1: Prep the Wall
Ensure the surface is clean, dry, and flat. A perfect bond starts with a spotless wall.
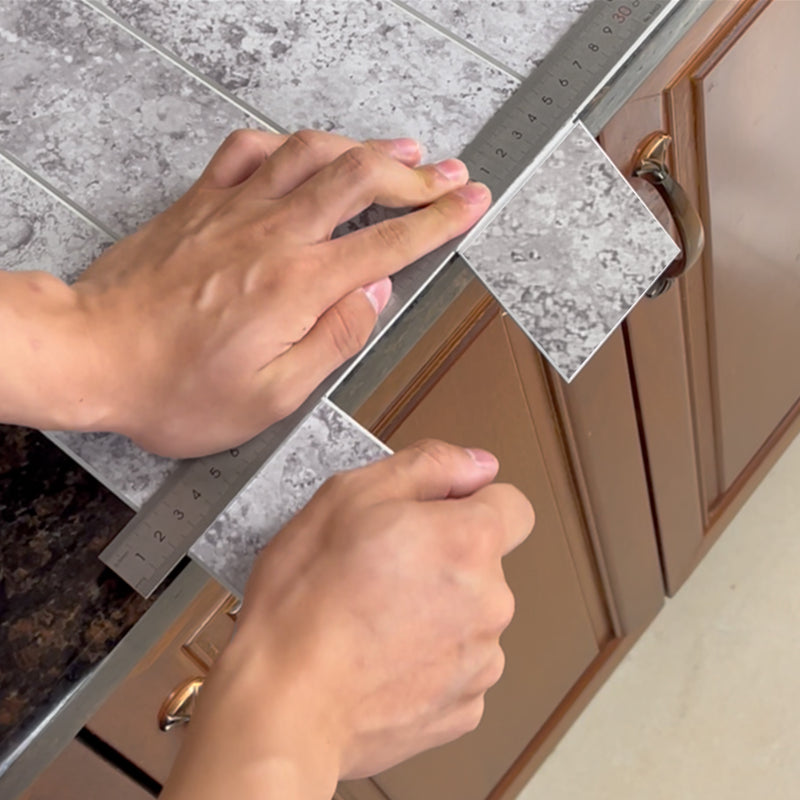
Step 2: Measure & Level
Measure your space and use a level to mark your starting guidelines. Accuracy is key!
Step 3: Cut to Fit
Use a utility knife to score and snap the tiles (or use a saw) to fit around outlets and corners.
Step 4: Position with Care
Peel back just the corner (about 1/4) of the liner. Align the tile to your marks and fix the position.
Step 5: Peel & Press
Slowly remove the rest of the liner while pressing the tile firmly from the center outward.
Step 6: Align & Repeat
Interlock the next tile tightly against the previous one. Maintain a level line throughout the process.
Cutting Grips Guidelines
Step 1: Apply the Grips
Attach 2-3 grips to the back of your ruler.

Step 2: Score the Tile
Press firmly and score the surface with a utility knife.
Step 3: Snap the Tile
Bend along the score line to snap the tile cleanly.
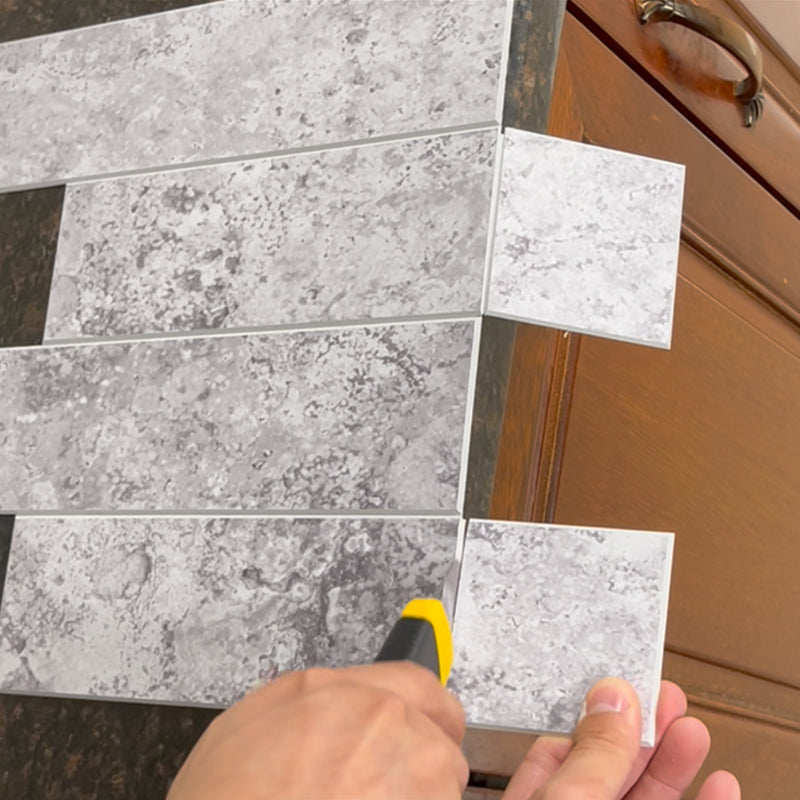
Step 4: Fully Separate
Run the utility knife along the score line to fully separate the tile cleanly.